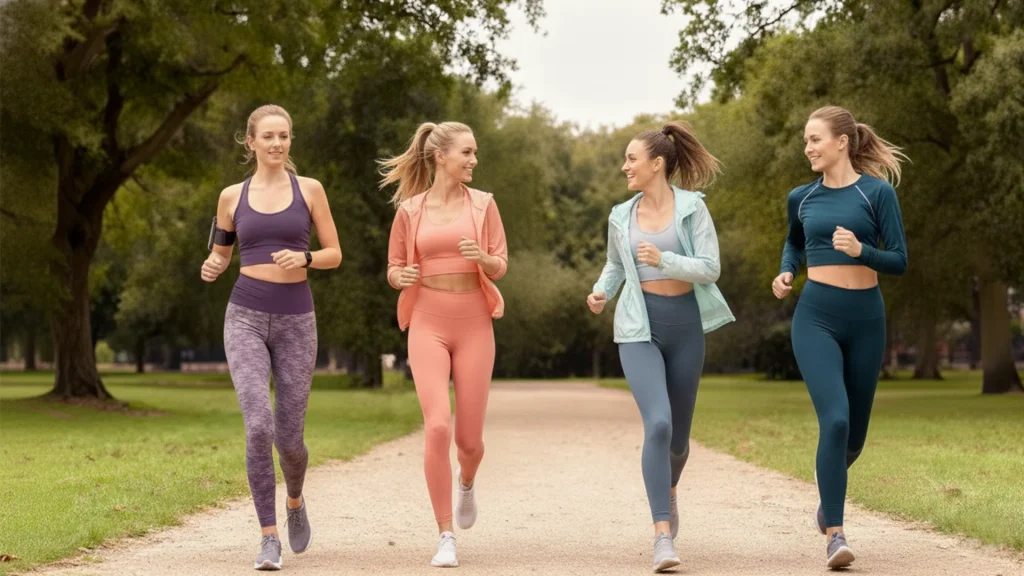
Running shorts can look right on a hanger and behave completely differently in motion. A waistband that sits flat in the fitting room can slip under load, a phone can bounce against the thigh, the liner can ride up, and the leg opening can fight a longer stride. None of that shows up while the wearer is standing still.
The good news is that evaluating a sample does not require a laboratory. It requires a defined use case, a set of movements that resemble the actual activity, realistic pocket contents, and someone writing down what happened. The point is not to pronounce the sample good or bad — it is to produce observations specific enough that the next sample can be changed in a targeted way.
Define the Intended Use Before the First Sample
Training, racing and trail running pull the design in different directions, and a sample cannot be judged without knowing which one it is for. A racing short optimises weight and minimal coverage; a training short tolerates more storage and more fabric; a trail short usually needs more pockets and a more protective hem. Before development starts, get these on paper:
- Who is the wearer? Gender, size range, and whether the fit target is a competitive runner or a general fitness customer.
- What type of running? Road, track, trail, treadmill, or gym and cross-training.
- What is the priority? Low weight, coverage, storage, or liner support — pick the one that wins when they conflict.
- What will be carried? Nothing, keys, a gel, or a phone. This single answer changes the pocket layout more than any other.
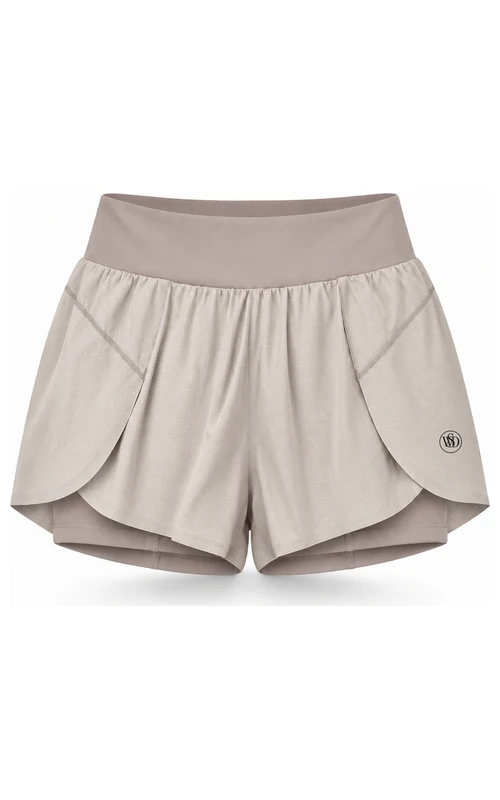
- Single layer or 2-in-1? A liner adds support and reduces chafing but adds a second fabric, a second fit to grade and a second cost line.
These answers feed directly into the pattern, the pocket placement, the liner construction and the fabric choice. Without them, sampling becomes guesswork and every revision is a coin flip.
Turn “It Feels Uncomfortable” into Something Actionable
“Something feels uncomfortable” is not feedback a pattern maker can use. The useful version names the location, the movement that triggered it, and the timing — immediately, after ten minutes, or only once the fabric is damp. The table below maps the common complaints to what to watch and which design details to review.
| What the wearer reports | What to observe | Design details to review |
|---|---|---|
| The waistband slips down | Which movement causes it, and whether pockets are loaded at the time | Waistband construction, drawcord, load position relative to the band |
| A phone bounces or pulls the shorts | Phone size and case, which pocket it is in, how far the shorts move | Pocket placement, opening orientation, support fabric behind the pocket |
| The liner rolls or shifts | Where it bunches, during which movement, and how long before it appears | Liner length, leg opening circumference, seam placement, liner fit |
| The leg opening restricts a longer stride | Where the tension is felt and at what point in the stride | Leg opening width, crotch construction, side split depth |
| Fabric clings once sweating | Which area clings, and whether it also clings when dry | Shell surface, shell-to-liner pairing, fit allowance |
An observation does not identify the cause by itself, and it is worth saying so plainly. “The liner rolls” could be a length problem, a circumference problem, a seam problem or a fit problem. What the observation does is narrow the field so the next round tests one hypothesis instead of three.
Test Pockets with Realistic Contents
Fitting a pocket empty tells you where it sits and how it looks. It tells you nothing about how it behaves at speed. Load the pocket with what your intended customer actually carries — a phone in its case, a set of keys, a gel — and then run.
Watch three things: whether the contents bounce, whether the pocket opening deforms under load, and whether the added weight drags the waistband or pulls the liner sideways. Note the exact item, including the phone model and case, because a 6.1-inch phone in a slim case and a 6.7-inch phone in a rugged case are different loads and will give different results on the same pocket.
This is also where a claim gets earned or dropped. “No bounce” is not a property a fabric has; it is an outcome of a specific pocket, a specific load and a specific speed. If a supplier states it without naming the load, the claim is marketing rather than a tested result. A safer claim names the condition: a pocket that holds a phone of a stated size without measurable movement at training pace is a statement you can defend.
Check How the Shell and the Liner Move Together
A 2-in-1 short has two layers, but the wearer experiences one garment. That is the whole design intent and also the whole risk. During running, leg lifts and direction changes, watch for the failure modes that only appear in motion:
- Does the liner roll, bunch or shift upward at the thigh?
- Does the outer shell pull against the liner, or does the liner drag the shell out of position?
- Does the waist feel restrictive where the two layers are joined?
- Does the liner show below the outer hem by a consistent amount on both legs, or does it creep on one side?
Then review the relationship rather than each layer in isolation: the relative length of the two layers, the difference in their leg-opening circumferences, and how they are joined at the waist. A liner joined by an overlock seam behaves differently from one held in an elastic casing — the casing adds bulk at the hip and a second line of elastic, while the overlocked join sits closer to the body. If an issue appears, record location and movement before deciding whether to change the pattern, the fabric, or the construction. Changing all three at once makes the next round unreadable.
Evaluate Bonded Leg Openings with Simple Checks
A bonded leg opening produces a flatter, cleaner edge with less seam bulk than a stitched hem, which is why it appears on streamlined running shorts. It is one construction option, not a universal upgrade. Bonding is a heat-and-tape process, and it only performs as well as the tape matches the fabric it is applied to.
Three checks cover most of it without any equipment:
- Stretch and release. Gently stretch the bonded edge along its length and let go. It should recover without leaving a rippled or wavy edge.
- Feel the edge. Run a finger along the inside of the hem. Sharpness, stiffness or a visible glue line is a comfort risk on a high thigh, where the hem contacts skin with every stride.
- Wash and re-inspect. Wash the sample exactly as the care label instructs, dry it, then check for lifting, puckering, bubbling or separation at the edge and at the tape boundary.
The right finish is the one that still feels comfortable and still looks flat after care — not the one that looked best in the sample room. If a bonded hem fails after washing, the answer is usually the tape specification or the application temperature, not the concept.
Keep Damp and Post-Wash Checks Simple
Two simple checks catch a large share of problems that a dry fitting misses. Neither needs a lab.
The damp check. Have someone actually run in the shorts until they are damp, then observe: does the fabric cling to the thigh, does the liner shift more than it did dry, does the leg opening start to chafe or roll. Damp behaviour is where shell-liner pairing shows its weaknesses, and it cannot be simulated by spraying water on a hanger.
The post-wash check. Wash the sample to its care instructions, dry it, and compare it against the pre-wash state. Check whether the waistband has lost recovery, whether the liner has stretched or shrunk out of proportion, and whether the hem has gone uneven. Photograph anything that changed, note where, and keep the photo with the sample record — a photo lets the pattern room see the problem without needing the garment back.
Where Standard Test Methods Fit — and Where They Do Not
When a fabric claim needs independent data, two references come up often in running apparel. They are worth understanding precisely, because they are frequently cited as if they proved more than they do.
AATCC TM195 — Liquid Moisture Management Properties of Textile Fabrics. This method puts a fixed dose of saline on one face of an 8 × 8 cm fabric specimen and tracks how the liquid behaves for 120 seconds: wetting time, absorption rate, maximum wetted radius, spreading speed, one-way transport and an overall moisture management capacity score. It reports grades per parameter plus a fabric-type classification. Two limits matter here. First, it measures liquid movement only — not drying rate, which belongs to a different method family (AATCC TM199, TM200 and TM201). Second, it tests a flat, unstretched specimen, so it cannot account for stretch in wear, seams, or a garment with a liner, a waistband and a bonded hem on a runner at kilometre eight.
ISO 12947-2 — Textiles, determination of abrasion resistance by the Martindale method, Part 2: Determination of specimen breakdown. A circular fabric specimen is rubbed in a Lissajous pattern against a standard wool abradant and inspected at fixed intervals until it breaks down — reported as the number of rubs (cycles) reached. For apparel the load is normally 9 kPa. The current edition is ISO 12947-2:2016, and it explicitly excludes coated and laminated fabrics, which go to the ISO 5470 series instead. Note what it does and does not rank: it discriminates clearly different fabrics well, but the standard itself has no garment procedure, and the industry consensus is that Martindale cycles are a screening tool rather than a wear-life prediction. It does not reproduce the mixed friction a liner sees against a thigh during a stride, or the laundering that wears a running short faster than running does.
Both are useful, and both assess fabric properties in isolation. Neither replaces a running trial of the complete garment, and a supplier who presents a lab report as proof of comfort is overstating what the report covers. The practical sequence is: run the garment checks first, then use standard methods to characterise the fabric once you know what you are trying to prove.
Give Each Sample Round One Clear Focus
A fitting does not need to assess everything at once, and trying to do so is how feedback turns vague. Pick the single main issue for that round — pocket movement, liner stability, or the bonded hem after washing — and hold the rest constant.
Record enough context that the result is reproducible: sample size, fabric version, the items loaded into pockets, which movements were performed, and how long the wearer ran. Then point the next revision at the specific finding. When feedback reads “the left liner edge rolled after about 20 minutes at training pace, both with and without a phone loaded,” a pattern maker can act on it. When it reads “make it feel better,” they cannot.
Frequently Asked Questions
Is a bonded hem always better than a stitched hem?
No. Bonded hems give a flatter, cleaner finish with less bulk, but they depend on the tape matching the fabric, and they are harder to repair in production than a stitched seam. For a lightweight race short they are usually the right call; for a heavier training short a stitched hem can be more durable and more forgiving. Confirm it on a washed sample rather than on a catalog sample.
Can I rely on a supplier’s “no bounce” or “sweat-proof” claim?
Only if the claim names the test condition. “No bounce” means nothing without the pocket, the load and the pace. Ask what was loaded, how large it was, and at what speed it was tested. If the answer is vague, treat the claim as unverified and test it yourself with a representative item.
What is a realistic MOQ for a custom running short?
For a standard fabric and construction, 100 pieces per style per colour is a common entry point, splittable across sizes within a colour. Expect a higher minimum if you specify a custom-developed fabric, a bespoke print, or a bonded hem with a tape that has to be sourced for your fabric. Ask for the minimum to be quoted per component, not as a single blended number.
Developing a Running Apparel Range?
If you are working on running shorts and want a second pair of eyes on the construction before you commit to samples, send us the design direction, the intended use and the details you are unsure about. We build 2-in-1 and single-layer running shorts in custom fabrics, and we will tell you which details are worth specifying and which are not worth the cost.
Start with our 2-in-1 running shorts to see how the construction is put together, browse the custom fitness and sports shorts range, or read the guide to activewear testing services if you want to know how to verify what a supplier tells you.
Request a free quote, or read our sample policy if you would rather start with one short in your hands.